Introduction to Knitting Gauge
Welcome to the world of knitting! One of the most important aspects you’ll need to understand is the concept of knitting gauge. In this section, we’ll delve into what knitting gauge is and why it’s so crucial in your knitting projects.
- Understanding Knitting Gauge
- Importance of Knitting Gauge in Projects
Knitting gauge, also known as tension, refers to the number of stitches and rows in a specific measurement, usually a 4-inch or 10cm square, when knitting with a particular yarn and needle size. It’s like a recipe for knitting. Just like you need the right ingredients in the right amounts to make a cake, you need the correct number of stitches and rows to make your knitting project turn out as planned.
Why is knitting gauge so important? Imagine you’re knitting a sweater. You’ve chosen your pattern and your yarn, and you’re ready to get started. But if your gauge is off, your sweater might end up too big or too small. That’s because the pattern you’re using was written based on a specific gauge. If your gauge doesn’t match the pattern’s gauge, your finished project won’t be the right size. That’s why understanding and checking your gauge is a crucial step in knitting.
Now that you have a basic understanding of what knitting gauge is and why it’s important, we’ll move on to some more detailed aspects of knitting. We’ll cover everything from creating your first swatch to mastering gauge swatches in the following sections. So, grab your knitting needles and let’s dive in!
Knitting for Beginners: The Basics
If you’re new to the world of knitting, you’re in for a treat. Knitting is not only a fun and creative hobby, but it’s also a great way to relax and unwind. In this section, we’ll cover the basics you need to get started with knitting.
Getting Started with Knitting
Before you can start knitting, there are a couple of things you need to understand. First, you need to choose the right knitting needles. Second, you need to understand yarn weights. Let’s dive into these topics.
- Choosing the right knitting needles
- Understanding yarn weights
Knitting needles come in different sizes and materials. The size of the needle you choose will affect the size of your stitches. For beginners, it’s best to start with a medium-sized needle (around size 8 or 9). As for the material, needles can be made of bamboo, plastic, or metal. Bamboo needles are the most beginner-friendly because they’re lightweight and not too slippery.
Yarn weight refers to the thickness of the yarn. There are several different yarn weights, from lace (very thin) to jumbo (very thick). For beginners, it’s best to start with a medium weight yarn, also known as worsted weight. This type of yarn is easy to work with and is suitable for a wide range of projects.
Now that you have your knitting needles and yarn, you’re ready to start knitting! In the next section, we’ll cover some basic knitting techniques.
Introduction to Knitting Techniques
Knitting is a wonderful craft that allows you to create beautiful and unique items. It’s a skill that can be learned by anyone, regardless of age or ability. In this section, we will introduce you to some basic knitting techniques that every beginner should know.
- Basic Knitting Stitches
- Increasing and Decreasing Stitches
There are two fundamental stitches in knitting: the knit stitch and the purl stitch. Mastering these two stitches is the key to unlocking all other knitting techniques.
The Knit Stitch is the most basic stitch in knitting. It’s the first stitch you’ll learn and the one you’ll use the most. To make a knit stitch, you insert your right needle into the first stitch on the left needle from left to right, wrap the yarn around the right needle, and pull it through to create a new loop on the right needle.
The Purl Stitch is the second basic stitch in knitting. It’s essentially the opposite of the knit stitch. To make a purl stitch, you insert your right needle into the first stitch on the left needle from right to left, wrap the yarn around the right needle, and pull it through to create a new loop on the right needle.
Increasing and decreasing stitches are techniques used to shape your knitting. They allow you to add or remove stitches from your row, which can create a variety of shapes and designs.
Increasing Stitches is a way to add more stitches to your row. There are several ways to increase stitches, but the most common method is called a “knit front and back” (KFB). To do a KFB, you knit into the front and back of the same stitch, effectively creating two stitches where there was only one before.
Decreasing Stitches is a way to remove stitches from your row. There are several ways to decrease stitches, but the most common method is called a “knit two together” (K2T). To do a K2T, you knit two stitches together as if they were one, effectively turning two stitches into one.
These basic knitting techniques are the foundation of all knitting projects. By mastering these skills, you’ll be well on your way to becoming a proficient knitter. Remember, practice makes perfect, so don’t be discouraged if you don’t get it right the first time. Keep trying, and soon you’ll be knitting like a pro!
Swatch Knitting Guide: Creating Your First Swatch
Creating your first knitting swatch is an exciting step in your knitting journey. This process allows you to practice your stitches, measure your gauge, and ensure your final product will fit perfectly. Let’s dive into the steps to create a knitting swatch and how to measure the knitting gauge on a swatch.
-
Steps to Create a Knitting Swatch
Creating a knitting swatch is simpler than it might seem. Here are the steps to guide you:
- Choose Your Yarn and Needles: Start by selecting the type of yarn and the size of knitting needles you plan to use for your project.
- Cast On: Begin your swatch by casting on enough stitches to make a square that is at least 4 inches wide.
- Knit: Continue knitting in the pattern you plan to use for your project until your swatch is a square.
- Bind Off: Once your swatch is the right size, bind off your stitches and cut your yarn, leaving a tail to weave in.
- Block Your Swatch: Soak your swatch in warm water, gently squeeze out the excess water, and lay it flat to dry. This helps to set the stitches and gives you a more accurate gauge measurement.
-
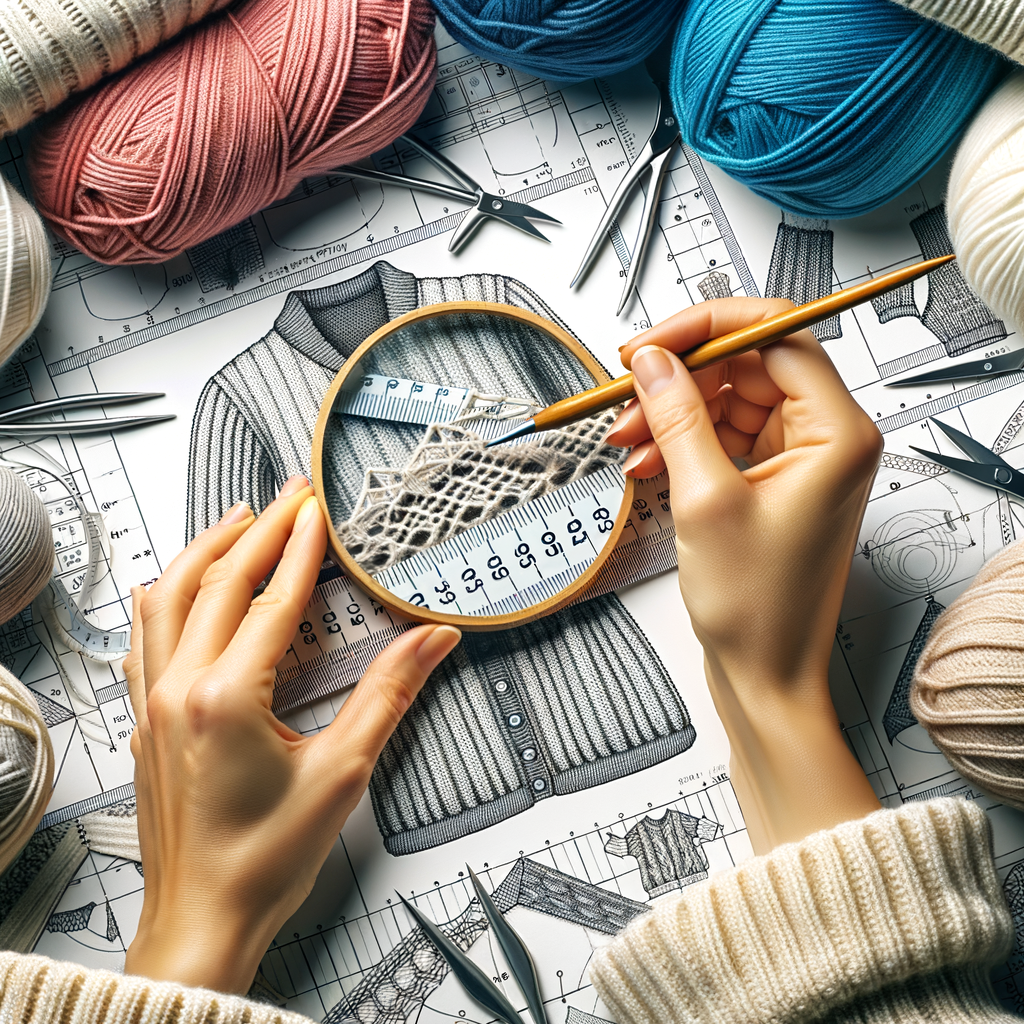
Measuring Knitting Gauge on a Swatch
Once you’ve created your swatch, it’s time to measure your gauge. This is a crucial step to ensure your finished project fits as intended. Here’s how to do it:
- Prepare Your Tools: You’ll need a ruler or a special knitting gauge tool.
- Count Your Stitches: Lay your ruler across the middle of your swatch and count how many stitches are in 4 inches. This is your stitch gauge.
- Count Your Rows: Turn your ruler vertically and count how many rows are in 4 inches. This is your row gauge.
- Compare Your Gauge: Compare your gauge to the one listed in your pattern. If they match, you’re ready to start your project! If not, you may need to adjust your needle size or your tension.
Remember, practice makes perfect. Don’t be discouraged if your first swatch isn’t perfect. With time and patience, you’ll master the art of swatch knitting and gauge measurement, bringing you one step closer to creating beautiful, well-fitted knitted items.
Deep Dive into Knitting Gauge
Understanding the knitting gauge is crucial for every knitter, whether you’re a beginner or an expert. In this section, we’ll delve deeper into this important concept and its impact on your knitting projects.
Understanding the Role of Gauge in Knitting
Knitting gauge, also known as tension, refers to the number of stitches and rows per inch in your knitting. It plays a vital role in determining the size and fit of your finished project. Let’s explore how gauge affects your knitting and some techniques to adjust it.
- How gauge affects the size of your knitting project
- Knitting gauge adjustment techniques
The gauge is the foundation of your knitting project. If your gauge is off, your finished project will not be the correct size. For instance, if your gauge is too loose, your project will be larger than expected. Conversely, if your gauge is too tight, your project will be smaller. Therefore, it’s crucial to match the gauge specified in your knitting pattern to ensure a perfect fit.
Adjusting your knitting gauge can be as simple as changing your needle size. If your stitches are too tight, try using larger needles. If they’re too loose, switch to smaller needles. Another technique is to adjust your knitting style. For example, if you knit English style, try switching to Continental as it tends to produce looser stitches. Remember, practice makes perfect. The more you knit, the better you’ll get at controlling your gauge.
In conclusion, understanding and controlling your knitting gauge is essential for successful knitting projects. By paying attention to your gauge and making necessary adjustments, you can ensure your finished projects turn out just as you envisioned.
Common Issues with Knitting Gauge
Knitting gauge is a crucial aspect of any knitting project. It can significantly impact the final size and fit of your piece. However, many knitters encounter common issues with their knitting gauge. Let’s delve into these problems and explore some practical solutions.
- Dealing with Gauge That’s Too Tight or Too Loose
- Adjusting Your Knitting Technique to Fix Gauge Issues
One of the most common issues knitters face is dealing with a gauge that’s either too tight or too loose. This problem can result in a finished product that’s either smaller or larger than intended. For instance, if your gauge is too tight, your knitted item might end up being too small. On the other hand, a loose gauge can result in an overly large piece.
So, how do you deal with this issue? The key is to adjust your tension. If your stitches are too tight, try to relax your grip on the yarn. Conversely, if your stitches are too loose, try to hold the yarn a bit tighter. Remember, practice makes perfect. So, don’t be discouraged if you don’t get it right the first time.
Another common issue is not knowing how to adjust your knitting technique to fix gauge issues. If changing your grip on the yarn doesn’t solve the problem, you might need to adjust your knitting technique.
One effective method is to change the size of your knitting needles. If your gauge is too tight, try using larger needles. If it’s too loose, switch to smaller needles. This adjustment can significantly impact your gauge and help you achieve the desired size for your project.
Another technique is to alter your knitting style. For example, if you usually knit English style (holding the yarn in your right hand), you might find that switching to Continental style (holding the yarn in your left hand) can help you loosen your gauge.
In conclusion, dealing with knitting gauge issues can be challenging, but with patience and practice, you can overcome these common problems. Remember, the key is to keep experimenting with different techniques until you find what works best for you. Happy knitting!
Sweater Knitting Patterns: Understanding the Role of Gauge
When it comes to sweater knitting patterns, understanding the role of gauge is crucial. The gauge, also known as tension, refers to the number of stitches and rows per inch that you get when you knit with a specific yarn and needle size. It’s a key factor in determining the size and fit of your finished sweater. Let’s delve into the importance of gauge in sweater knitting patterns and how to adjust it for different sweater sizes.
- Importance of gauge in sweater knitting patterns
- How to adjust gauge for different sweater sizes
Gauge is the foundation of any knitting project. It ensures that your finished sweater matches the dimensions specified in the pattern. If your gauge is off, even by a little, it can significantly affect the fit and appearance of your sweater. For instance, if your gauge is too tight, your sweater may end up smaller than intended. Conversely, if your gauge is too loose, your sweater may turn out larger than expected. Therefore, achieving the correct gauge is vital to ensure your hard work results in a well-fitted, beautiful sweater.
Adjusting the gauge for different sweater sizes involves changing the size of your knitting needles or the thickness of your yarn. If your gauge is too tight, you can use larger needles or thicker yarn to loosen it. If your gauge is too loose, you can use smaller needles or thinner yarn to tighten it. Remember, it’s essential to knit a gauge swatch before starting your sweater to check your gauge. If it doesn’t match the pattern’s gauge, adjust your needles or yarn accordingly until it does.
Understanding the role of gauge in sweater knitting patterns is a skill that every knitter should master. It’s the secret to creating sweaters that fit perfectly and look professional. So, take the time to learn about gauge and practice adjusting it for different sweater sizes. Your future self, wearing a beautifully knitted sweater that fits just right, will thank you.
| Problem | Solution |
|---|---|
| Gauge is too tight | Use larger needles or thicker yarn |
| Gauge is too loose | Use smaller needles or thinner yarn |
Advanced Knitting Techniques: Mastering Gauge Swatches
As you progress in your knitting journey, you’ll encounter more complex patterns that require a deeper understanding of gauge swatches. Mastering this advanced knitting technique is crucial for creating high-quality, well-fitted garments. Let’s delve into the world of gauge swatches and learn how to create and measure them for complex patterns.
Gauge Swatches in Knitting: A Detailed Guide
Gauge swatches are small, square pieces of knitting that are used to measure the number of stitches and rows per inch. They are essential for ensuring that your finished project fits correctly. This guide will walk you through the steps of creating and measuring gauge swatches for complex patterns, including lace and cable swatches.
- Creating a gauge swatch for complex patterns
- Measuring gauge on a lace or cable swatch
Creating a gauge swatch for complex patterns requires patience and precision. Start by choosing the same yarn and needles you plan to use for your project. Cast on enough stitches for about 4 inches of knitting, plus a few extra for a border. Knit in the pattern stitch until your swatch is square, then bind off. Remember, it’s important to treat your swatch the same way you will treat your finished garment. So, if you plan to block your garment, block your swatch too.
Measuring gauge on a lace or cable swatch can be tricky due to the intricate stitch patterns. Use a ruler or a gauge measure tool to count the number of stitches and rows in one inch. Try to measure in several different places on your swatch to get an accurate average. If your gauge matches the pattern’s gauge, you’re ready to start your project. If not, you may need to adjust your needle size or tension.
Mastering gauge swatches is a skill that will significantly improve your knitting projects. It ensures that your garments fit correctly and look professional. So, take your time, practice, and soon you’ll be creating beautiful, well-fitted knitted pieces.
| Knitting Technique | Description |
|---|---|
| Gauge Swatch | A small, square piece of knitting used to measure the number of stitches and rows per inch. |
| Lace or Cable Swatch | A type of gauge swatch with intricate stitch patterns. Requires careful measurement for accurate gauge. |
Conclusion: The Art of Knitting and Gauge Mastery
As we wrap up this comprehensive guide on knitting and gauge mastery, it’s essential to reflect on the journey we’ve taken together. We’ve explored the basics of knitting, delved into the art of creating your first swatch, and taken a deep dive into the world of knitting gauge. We’ve also examined the role of gauge in sweater knitting patterns and mastered advanced knitting techniques. Now, let’s summarize the key takeaways and discuss the next steps in your knitting journey.
- Key takeaways on mastering knitting gauge
- Next steps in your knitting journey
Understanding and mastering the knitting gauge is crucial to achieving perfect fit and finish in your knitting projects. Remember, the gauge is the number of stitches and rows per inch. It’s influenced by factors like yarn type, needle size, and your personal knitting style. Always create a gauge swatch before starting a project, and adjust your needle size as needed to match the pattern’s suggested gauge.
Now that you’ve mastered the art of knitting and gauge, it’s time to apply these skills to your own projects. Start with simple patterns and gradually move on to more complex designs. Don’t be afraid to experiment with different yarn types and needle sizes. Remember, practice makes perfect. So, keep knitting, keep learning, and most importantly, enjoy the process!
In the words of Stephanie Pearl-McPhee, a well-known knitting author, “Knitting is not just about the product, but also the process.” So, embrace the journey, and let the art of knitting bring joy and creativity into your life.
| Key Knitting Concepts | Details |
|---|---|
| Knitting Gauge | The number of stitches and rows per inch in a knitted fabric. |
| Gauge Swatch | A small sample piece knitted to determine the gauge. |
| Needle Size | Impacts the size of the stitches and thus, the gauge. |
| Yarn Type | Different yarns can result in different gauges. |