Introduction to Knitting for Beginners
Welcome to the world of knitting! This craft is not only a fun hobby but also a practical skill that can provide you with cozy scarves, hats, and blankets. Whether you’re looking to create unique gifts for loved ones or simply want to enjoy a relaxing pastime, knitting is a wonderful choice. In this guide, we will cover the basics of knitting, the materials you’ll need, and some common knitting terminologies. Let’s get started!
- Understanding the Basics of Knitting
- Materials Needed for Knitting
- Knitting Needles: These come in different sizes and types. For beginners, a pair of size 8 (5mm) needles is a good start.
- Yarn: There’s a wide variety of yarns available, each with its own unique characteristics. For beginners, a medium-weight yarn is recommended.
- Scissors: You’ll need a good pair of scissors to cut your yarn when you’ve finished your project.
- Tapestry Needle: This is used to weave in loose ends of yarn at the end of your project.
- Common Knitting Terminologies
- Cast On: This is the method used to create the initial stitches on your needle.
- Knit (K): This refers to the basic knit stitch.
- Purl (P): This is the other basic stitch, which is essentially a reverse knit stitch.
- Bind Off: This is the method used to finish your project and remove it from the needles.
Knitting is a craft that involves creating fabric from yarn. This is done by making a series of loops, known as stitches, and interlocking them together. There are two basic types of stitches in knitting: the knit stitch and the purl stitch. Mastering these two stitches can enable you to create a wide variety of patterns and textures.
To start knitting, you’ll need a few essential materials. These include:
As with any new skill, knitting comes with its own set of terms and abbreviations. Here are a few common ones:
Now that we’ve covered the basics, you’re ready to start your knitting journey. Remember, practice makes perfect. Don’t be discouraged if your first few attempts don’t turn out as you’d like. Keep trying, and soon you’ll be creating beautiful knitted items!
Basics of Knitting in the Round
Knitting in the round is a fundamental skill that every knitter should have in their arsenal. It allows you to create seamless tubes of fabric, perfect for crafting items such as hats, socks, and sweaters. Let’s delve into the basics of this essential knitting technique.
- What is knitting in the round?
- Benefits of knitting in the round
- Materials needed for knitting in the round
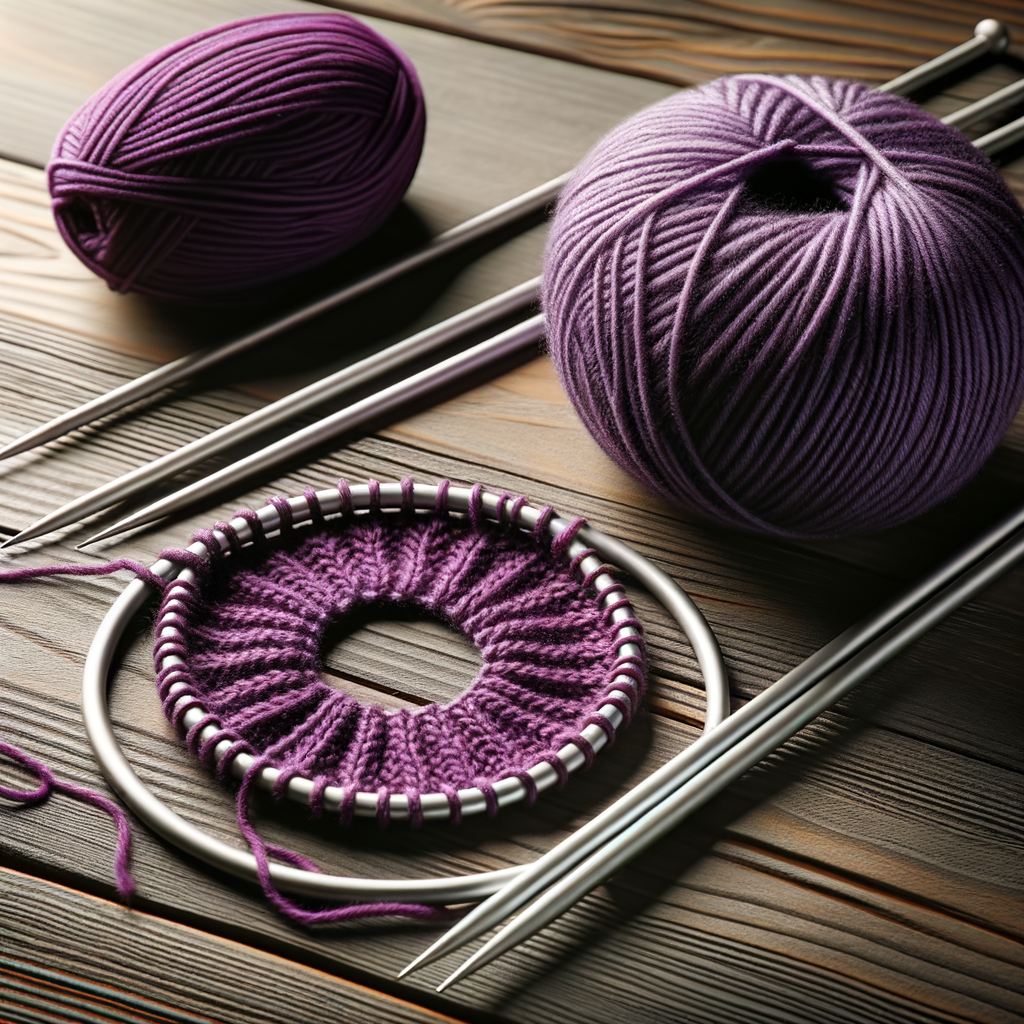
- Yarn: Choose a yarn suitable for your project. The weight and fiber content of the yarn can significantly impact the final product.
- Needles: You’ll need either circular needles or double-pointed needles (DPNs), depending on the size of your project. Circular needles are great for larger projects like sweaters, while DPNs are typically used for smaller projects like socks.
- Stitch markers: These are used to mark the beginning of your round, helping you keep track of your progress.
- Pattern: A good pattern is essential, especially for beginners. It will guide you step-by-step through your project, ensuring a successful outcome.
Knitting in the round is a technique used to create a seamless tube of fabric. Instead of knitting back and forth in rows, you knit continuously in a spiral or circular pattern. This method is ideal for projects that are naturally tube-shaped, like socks, hats, and sleeves.
Knitting in the round has several advantages. Firstly, it eliminates the need for seams, which can be bulky and uncomfortable. Secondly, it allows for continuous knitting, making it faster and more efficient. Lastly, it opens up a whole new world of design possibilities, such as intricate colorwork and patterns that are only possible when knitting in the round.
To start knitting in the round, you’ll need a few basic materials. These include:
Now that you understand the basics of knitting in the round, you’re ready to start your first project. Remember, practice makes perfect, so don’t be discouraged if your first few attempts aren’t perfect. Happy knitting!
Beginner’s Guide to Knitting in the Round
Knitting in the round is a popular technique that allows you to create seamless tubes of fabric. It’s perfect for knitting hats, socks, mittens, and many other items. But if you’re new to this method, it can seem a bit intimidating. Don’t worry! This guide will walk you through the process step by step.
Step-by-Step Round Knitting Techniques
Let’s break down the process of knitting in the round into four simple steps. We’ll start with casting on, then move on to joining in the round, knitting and purling, and finally, binding off.
- How to Cast On in the Round
- How to Join in the Round
- How to Knit and Purl in the Round
- How to Bind Off in the Round
Casting on in the round is similar to casting on for flat knitting. You’ll start by making a slipknot and placing it on one of your needles. Then, you’ll add more stitches until you have the number you need for your project. Remember, the number of stitches you cast on should be a multiple of the number of needles you’re using.
Once you’ve cast on your stitches, you’re ready to join in the round. This is where you’ll connect the first and last stitches you cast on to form a circle. To do this, you’ll need to make sure your stitches aren’t twisted. Then, you’ll knit the first stitch you cast on, pulling the yarn tight to join the round.
Knitting and purling in the round is just like knitting and purling in flat knitting. The only difference is that you’re working in a continuous spiral instead of back and forth. To knit, you’ll insert your right needle into the first stitch on your left needle, wrap your yarn around, and pull it through. To purl, you’ll do the same thing, but with your yarn in front of your work.
Binding off in the round is the final step in your project. To do this, you’ll knit the first two stitches, then pass the first stitch over the second. Repeat this process until you’ve bound off all your stitches. Then, cut your yarn and pull it through the last stitch to secure it.
And there you have it! With these steps, you can start knitting in the round like a pro. Remember, practice makes perfect, so don’t be discouraged if it takes a few tries to get the hang of it. Happy knitting!
Knitting in the Round Tutorial
Knitting in the round is a popular technique among knitters. It allows you to create seamless tubes of fabric, perfect for items like hats, socks, and sweaters. However, like any knitting technique, it comes with its own set of challenges. Let’s explore some common mistakes and how to avoid them.
Common Mistakes and How to Avoid Them
When you’re new to knitting in the round, you may encounter a few common mistakes. Don’t worry; these are all part of the learning process. Here are three common mistakes and tips on how to avoid them:
- Twisting the Stitches
- Incorrect Joining
- Difficulty in Maintaining Tension
Twisting stitches is a common mistake when knitting in the round. This happens when the stitches on your needle twist as you join them in the round. To avoid this, make sure your stitches are not twisted before you join them. You can do this by laying your work flat on a table and making sure all the stitches are aligned.
Another common mistake is incorrectly joining your work in the round. This can result in a gap or a twist in your work. To avoid this, make sure you join your work correctly. You can do this by knitting the first stitch of the next round with the working yarn from the last stitch of the previous round.
Maintaining consistent tension can be challenging when knitting in the round, especially for beginners. If your tension is too loose, your stitches will be too big, and if it’s too tight, your stitches will be too small. To maintain consistent tension, try to keep your yarn at the same tension throughout your project. You can do this by wrapping the yarn around your fingers in the same way each time you knit a stitch.
Remember, practice makes perfect. Don’t be discouraged if you make mistakes. With time and patience, you’ll be able to knit in the round like a pro.
Knitting Basics for Beginners: Round Knitting
Round knitting is a fantastic skill for any beginner to master. It allows you to create seamless tubes of fabric, perfect for items like hats, socks, and mittens. Let’s dive into some basic projects that will help you practice and perfect your round knitting skills.
Practice Projects for Beginners
Here are three simple projects that are perfect for beginners. They will help you get comfortable with the technique of round knitting while creating useful and beautiful items.
- Knitting a Simple Beanie
- Knitting a Circular Scarf
- Knitting a Pair of Mittens
Beanies are a great starting point for beginners. They’re small, quick to knit, and give you the chance to practice your new skills. To knit a beanie, you’ll need to learn how to cast on, knit, purl, and decrease stitches. Once you’ve mastered these basics, you’ll be able to create a cozy beanie in no time.
A circular scarf, also known as an infinity scarf, is another excellent project for beginners. This project will allow you to practice knitting in the round on a larger scale. Plus, the result is a stylish accessory that you can wear with pride.
Mittens are a bit more challenging than beanies or scarves, but they’re a great way to further develop your skills. You’ll learn how to shape the thumb and fingers, giving you a better understanding of how to create different shapes with your knitting.
All these projects require patience and practice, but don’t be discouraged if you make mistakes along the way. Remember, every knitter was once a beginner. Keep practicing, and soon you’ll be knitting in the round like a pro!
Learn to Knit in the Round: Tips and Tricks
Knitting in the round is a fun and rewarding skill that allows you to create seamless tubes of fabric. This technique is perfect for making hats, socks, sweaters, and more. Here are some tips and tricks to help you master this skill.
- Choosing the Right Needles
- Maintaining Even Tension
- Managing Yarns for Colorwork
When it comes to knitting in the round, choosing the right needles is crucial. The size and type of needles you choose can greatly affect your final product. For beginners, it’s recommended to start with a size 8 or 9 circular needle. These are easy to handle and perfect for practicing your technique. Remember, the larger the needle size, the looser the stitches will be. So, choose your needles according to the desired tightness of your stitches.
Keeping an even tension is key to producing a uniform fabric. If your tension is too tight, your fabric will be stiff and may curl at the edges. On the other hand, if your tension is too loose, your stitches may look sloppy and your fabric may lack structure. To maintain even tension, try to keep your yarn at a consistent tightness as you knit. Practice makes perfect, so don’t be discouraged if you struggle with this at first. With time and practice, maintaining even tension will become second nature.
Knitting in the round opens up a world of possibilities for colorwork. However, managing multiple yarns can be a challenge. One tip is to keep your yarns separated and untangled. You can do this by using a yarn bowl or a yarn bag. Another tip is to twist your yarns at the beginning of each round to prevent holes in your fabric. Remember, practice is key when it comes to managing yarns for colorwork. So, don’t be afraid to experiment and find what works best for you.
With these tips and tricks, you’ll be well on your way to mastering the art of knitting in the round. Remember, practice makes perfect. So, keep practicing and don’t be afraid to try new techniques. Happy knitting!
Knitting in the Round for Beginners: Advanced Techniques
As you continue to grow your knitting skills, it’s time to explore some advanced techniques. One such technique is lace knitting in the round. This method can seem intimidating at first, but with a bit of practice, you’ll be creating beautiful lace patterns in no time.
Introduction to Lace Knitting in the Round
Lace knitting in the round involves creating intricate patterns using a series of yarn overs and decreases. The end result is a delicate, openwork fabric that looks stunning on shawls, scarves, and even sweaters. Let’s dive into the details.
- Understanding Lace Patterns
- How to Knit Lace in the Round
- Blocking Your Lace Project
Lace patterns are created by making holes in your knitting on purpose. These holes, combined with strategically placed decreases, form beautiful designs. Reading a lace pattern can be a bit tricky, especially for beginners. The key is to take it one row at a time and use stitch markers to keep track of your place.
Knitting lace in the round is similar to flat lace knitting, with one key difference: you’re working in a continuous spiral instead of turning your work at the end of each row. This means you’ll need to adjust your pattern to account for this. Start by casting on the required number of stitches, place a marker to indicate the beginning of the round, and then follow your lace pattern, making sure to move the marker up as you complete each round.
Once you’ve finished knitting, it’s time to block your project. Blocking is a process that helps shape your knitting and makes the lace pattern pop. To block your project, soak it in lukewarm water with a bit of mild soap. Then, gently squeeze out the excess water (don’t wring it!), spread your project out on a towel, and pin it into shape. Let it dry completely before removing the pins.
Remember, mastering lace knitting in the round takes time and patience. Don’t be discouraged if your first few attempts aren’t perfect. Keep practicing, and soon you’ll be creating beautiful lace projects with ease.
Easy Guide to Round Knitting: Conclusion
As we wrap up our comprehensive guide on round knitting, it’s time to take a step back and review what we’ve learned. This recap will solidify your understanding and prepare you for the next steps in your knitting journey.
- Recap of the knitting in the round process:
- Next steps in your knitting journey:
Knitting in the round is a versatile technique that allows you to create seamless tubes of fabric. We started with the basics, introducing you to the concept and the tools required, such as circular or double-pointed needles. We then walked you through a step-by-step tutorial, where you learned how to cast on, join in the round, and knit without creating a seam. We also shared some tips and tricks to help you avoid common pitfalls, like twisting your stitches. Finally, we explored some advanced techniques, like colorwork and lace knitting in the round.
Now that you’ve mastered the basics of round knitting, you’re ready to take on more complex projects. Consider trying your hand at knitting a hat, a pair of socks, or even a sweater. Remember, practice is key in knitting. The more you knit, the more comfortable you’ll become with the techniques and the better your projects will turn out. Don’t be afraid to experiment and push your boundaries. Knitting is a journey of constant learning and discovery, and there’s always something new to learn.
In conclusion, round knitting is a valuable skill that opens up a world of possibilities for your knitting projects. We hope this guide has been helpful and has inspired you to continue exploring and expanding your knitting skills. Happy knitting!


