Knitting is a relaxing and rewarding hobby that anyone can learn.
As a beginner, you may find the array of knitting techniques, tools, and terminology a bit overwhelming.
Fear not; this article aims to break down the basics, making it easy for you to get started on your knitting journey.
First, we’ll explore the essential tools you should familiarize yourself with and discuss some common knitting terms you’ll encounter.
Then, we’ll guide you through preparations before beginning your first knitting project, along with the steps to start and various techniques to master.
Additionally, we’ll touch upon common projects and patterns, troubleshooting mistakes, yarn types, and how to finish your masterpiece.
Key Takeaways
- Becoming familiar with knitting tools and terminology is essential for beginners
- Adequate preparation and understanding of different knitting techniques is crucial for starting a project
- Exploring yarn types and patterns and overcoming mistakes will lead to successful and enjoyable knitting experiences.
Understanding Basic Knitting Tools
When I started learning to knit, there were a few basic tools that I found essential. Let me share my experience of using these tools with you.
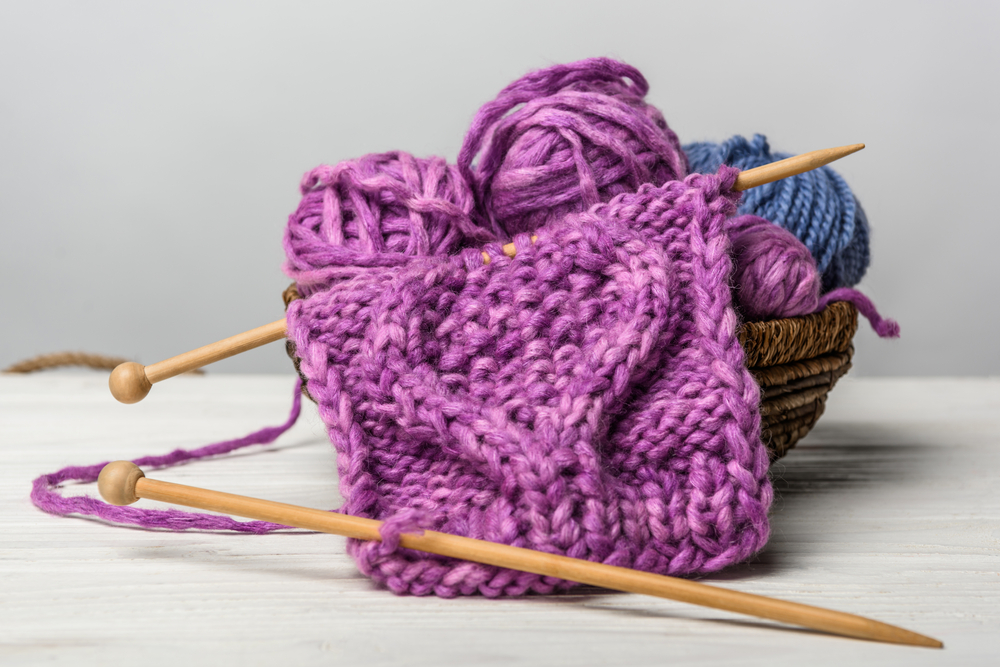
First and foremost, knitting needles are crucial for this craft. These come in various types and materials, but I find that beginners like myself find it easier to work with bamboo and wooden needles.
They are lightweight yet sturdy, allowing for a comfortable grip and a smoother knitting experience.
Now, let’s talk about yarn. Yarn comes in various colors, textures, and materials. At first, I was confused about the difference between a hank and a skein of yarn.
A hank is a yarn that’s wound into a loop, while a skein is a bundle of yarn that’s twisted into an oblong shape.
Both types can be used for knitting, but skeins may be more convenient for beginners as they are easier to unwind and knit with.
In addition to knitting needles and yarn, there are a few more tools that will help you on your knitting journey:
- Stitch markers: These little ring-shaped tools are a lifesaver when trying to keep track of your knitting. They can be slipped onto your knitting needle to mark important stitches or points in your knitting pattern.
- Tape measure: A must-have for measuring the size of your finished project or for checking your gauge (how many stitches per inch you are knitting).
- Scissors: You’ll need a decent pair of scissors to snip yarn ends and finish off your projects.
- Yarn needle: A blunt needle used for weaving in loose yarn ends or sewing pieces of your knitting together.
As you learn to knit, you might find other tools that work better for you or make your knitting easier.
It’s important to remember that knitting is a personal journey, and your preferences may change.
So, don’t hesitate to try out different knitting tools and see what works best for you.
Learning Basic Knitting Terms
As a beginner in knitting, I find it essential to familiarize myself with some basic knitting terms. This helps me better understand knitting patterns and follow instructions efficiently.
Let’s start with the two fundamental stitches: the knit stitch and the purl stitch.
The knit stitch is created by pulling a loop of yarn through the previous stitch to form a new loop on the right needle.
The purl stitch goes the opposite way, forming a loop on the left needle.
When beginning knitting, I need to cast on stitches; this process creates the foundation row of stitches.
Depending on the pattern, I place these stitches either on my left needle or my right needle.
After casting on, I can start practicing the basic stitch patterns like:
- Garter stitch: Knitting all rows of the pattern creates the garter stitch, which results in a textured, reversible fabric.
- Stocking stitch: This pattern is created using one row of knit stitches and one row of purl stitches.
- Moss stitch/Seed stitch: Moss stitch involves alternating knit and purl stitches within the same row and between rows.
- Rib stitch: Often used for cuffs and hems, it consists of repeated columns of knit and purl stitches.
Knitting stitch patterns can sometimes require decreasing or increasing the number of stitches.
For decreasing the stitches, I can use k2tog (knit two together) or ssk (slip, slip, knit).
Knitting in the first person singular allows me to create tube-like fabrics without a seam, ideal for socks and hats.
When my project is nearing completion, it’s time to cast off or bind off, which means securing the last row of stitches.
This prevents them from unraveling and gives a neat finish to my work.
As I continue to explore the world of knitting, I’m also learning about various knitting methods, like the English method.
This technique involves holding the yarn in my right hand and “throwing” it over the right needle to complete the stitch.
Remember, practice makes perfect.
Preparation Before You Start Knitting
Before we embark on our knitting journey, it’s essential to set up our workspace and gather the necessary supplies.
First, select a project you want to work on – a simple scarf or dishcloth is an excellent choice for beginners. You will need a ball of yarn and a pair of suitable knitting needles.
Once you have your yarn and needles, make sure to sit comfortably with plenty of light.
Hold the needles with your preferred hand – if you’re right-handed, you’ll mostly control the needle movement with your right hand, while left-handed knitters will do so with their left hand.
Now, let’s create a slipknot to start our knitting. Grasp the yarn with both hands and wrap it counter-clockwise around the index and middle fingers of your left hand.
Next, gently pull the loop over your fingers, making sure it keeps enough tension. This taut slipknot acts as our first loop.
When working with a slipknot, always remember to keep it stretchy so it’s easy to work with and adjust as needed.
As you become more familiar and comfortable with knitting, you’ll naturally create your slipknot without thinking.
Finally, it’s time to hold our knitting needles correctly. Slide the slipknot onto one of your needles and adjust the loop size according to your comfort.
Hold the needle in your right hand (or left hand for left-handed knitters) and use your left hand’s middle finger to hold the working yarn.
Now that we are all set up and prepared, we can begin our knitting adventure and learn different techniques, stitch by stitch. Happy knitting, my fellow beginners!
Steps to Start Your Knitting Project
As a beginner knitter, I found that starting a knitting project can be overwhelming. There are so many techniques to learn and different stitches to master.
In this section, I will share a friendly step-by-step tutorial for starting your knitting project, focusing on basic techniques to get you started.
First things first, you’ll need to cast on your stitches. Casting on is the process of creating loops on your needle, which will become the foundation of your project.
For beginners, I recommend starting with the long-tail cast-on method. It might seem a bit tricky at first, but practice makes perfect, and you’ll soon find it becomes second nature.
Once you have your stitches cast on, it’s time to start knitting! One basic knit stitch that is essential for beginners to learn is the English method.
This method requires you to hold the working yarn in your right hand, wrapping it around the needle to form a new loop.
As you knit, you’ll see a fabric forming with a series of V-shaped stitches, known as the stockinette stitch.
When you’re comfortable with the basic knit stitch, you might want to try more advanced techniques like the cable stitch.
Cable stitches create beautiful twisted patterns in your knitting and add texture to your projects.
While it might seem daunting at first, mastering the cable stitch will open up new creative possibilities for you as a knitter.
One thing that might confuse beginner knitters is the difference between knitting and crochet. While they both involve working with yarn, the processes and tools used are different.
In knitting, you use two knitting needles to create loops and stitches, whereas in crochet, you use a single hooked needle.
As a beginner, it’s essential to understand the distinction so you can ensure you’re learning the right techniques for your chosen craft.
Following this step-by-step tutorial and practicing consistently will help you gain confidence in your knitting abilities and set you on the path to becoming a skilled knitter.
Remember, every professional knitter once started as a beginner too!
Learning Different Knitting Techniques
I found that learning different knitting techniques has been a rewarding and creative experience.
As a beginner, it can be daunting, but there are many beginner-friendly knitting tutorials available to make the process enjoyable.
The first technique I learned was the knit stitch. It’s the foundation of knitting and essential in creating various patterns.
Once I got the hang of the knit stitch, it was time to learn the purl stitch. The purl stitch is the opposite of the knit stitch, and together they form the basis for countless knitting patterns.
With the knit and purl stitches under my belt, I was able to explore more exciting techniques.
The garter stitch, one of the simplest and most common patterns, consists of knitting every row. It has a subtle texture, and it’s perfect for scarves and blankets.
Next, I learned the stockinette stitch, formed by alternating between knitting and purling rows. It creates a smooth fabric with a distinct “V” pattern.
I also discovered the seed stitch, which involves alternating between knit and purl stitches within each row.
This technique creates a bumpy texture that adds character to any project.
As my skills developed, I became more experimental and started incorporating advanced knitting techniques.
These techniques add unique textures and designs to my projects, making them truly one-of-a-kind.
Learning various knitting techniques has enhanced my creativity and expanded my knitting horizons.
No matter your skill level, there are always new techniques to explore and enjoy.
Common Knit Projects and Patterns
As a beginner knitter, I found that starting with simple and small projects helped me learn different knitting techniques and build my skills.
Some common knit projects for beginners include scarves, hats, socks, and blankets.
Scarves are often the first knitting project a beginner tackles. They are simple to knit and don’t require advanced techniques.
There are countless knitting patterns available online for scarves in various stitch types, so I was able to choose one that best suited my taste and skill level.
When I became comfortable with basic stitches, I moved on to hats. These projects typically require circular needles and the ability to “knit in the round” which can be a bit more challenging but is a necessary skill for creating seamless hats.
As with scarves, there are many hat-knitting patterns available for beginners.
Another fun knitting project I tried was socks. Although they’re a bit more advanced than scarves and hats, socks can be a great way to learn new techniques, such as working with double-pointed needles and complicated stitch patterns.
Socks can be knit in a variety of styles and sizes, making them a versatile project for any knitter.
Blankets were a great way for me to practice knitting while also creating something cozy and warm.
Blanket projects can range from simple garter stitch to more complex patterns and can be knit using different sizes of needles and yarn.
Blankets can take a long time to complete, but they’re great for building stamina and patience in knitting.
To help me get started with my first knitting project, I found ready-made knitting kits available online.
These kits often include yarn, knitting needles, and a beginner-friendly pattern, making it easy for someone new to knitting like me to dive right in.
Here’s a summary of the projects I mentioned, along with the tools needed:
| Knitting Project | Tools and Techniques Required |
| Scarves | Basic stitches, straight needles |
| Hats | Circular needles, knit in the round |
| Socks | Double-pointed needles, stitch patterns |
| Blankets | Various stitch types, patience |
Remember to start with simple patterns and work your way up to more complex ones as you become more comfortable with knitting.
Troubleshooting Knitting Mistakes
As a beginner, I understand that making knitting mistakes is a common occurrence, and it’s essential to equip myself with the right tools and knowledge to fix them.
In this section, I’ll share a few friendly tips to help you tackle some common knitting mistakes.
One common mistake is a dropped stitch. When I notice a dropped stitch, I use a crochet hook to pick it up and pull it through the loop on the row below, ensuring that it’s not twisted.
To prevent dropped stitches, I always make sure to check my work regularly for any loose loops.
Sometimes, I may realize that I’ve been using the wrong yarn for my project. In this case, I unravel the work and start again with the correct yarn.
To avoid this mistake in the future, I make a habit of double-checking the yarn and needle size against the pattern requirements before starting.
When I run out of yarn and need to attach a new ball, I avoid knots by joining the old and new yarns through a simple technique.
I work a few stitches with both the old and new yarn held together, then drop the old yarn and continue with the new one. This creates a secure join without any unsightly knots.
Learning to recognize and fix knitting mistakes takes time and patience, but it’s an important skill to develop as a beginner.
By keeping a careful eye on my work and being aware of potential pitfalls, I can confidently enjoy my knitting journey and create beautiful projects.
Various Yarn Types and Their Uses
When I first started knitting, I realized that choosing the right yarn can make a huge difference in my projects. There are various types of yarns available, and each has its unique characteristics and uses.
In this section, I will discuss some of the most common yarn types and their uses.
Yarn Weight: Yarn weight refers to the thickness of the yarn strand. It plays a crucial role in determining the final look and feel of a knitted project.
There are several yarn weight categories, such as lace, super fine, fine, light, medium, bulky, and super bulky.
Each of these has different recommended knitting needle sizes and stitch gauges.
Chunky Yarn: Chunky yarn, also known as bulky yarn, is a thick and cozy type of yarn perfect for beginners.
Not only does it knit up quickly, but it also makes it easy to see and correct any mistakes. I find chunky yarn suitable for creating warm winter accessories such as scarves, hats, and cowls, as well as blankets and rugs.
Wool Yarn: Wool yarn is made from the fleece of sheep or other animals, such as alpacas. I love using wool yarn because it’s warm, breathable, and naturally water-resistant.
It’s an excellent choice for making a variety of projects, including sweaters, socks, and blankets.
There are different types of wool yarn, such as Merino, which is known for its softness and warmth, and rugged, durable varieties like Icelandic wool.
To choose the best yarn for your knitting project, consider the desired outcome and the climate in which the item will be used.
Chunky yarns work well for warm and cozy projects, while lighter-weight yarns are better suited for delicate, lightweight items.
Wool yarn offers the warmth and durability needed for colder climates, but be mindful of potential allergies and the care instructions for each type of yarn.
Remember, as a beginner, experimenting and trying out different yarn types can help you find the perfect fit for your projects.
Finishing a Knitting Project
When I finish my knitting project, I usually follow a few essential steps to tie everything together neatly.
First, I bind off, also known as casting off, to complete the final row of my project and create a smooth edge.
To do this, I simply knit two stitches and then pull the first stitch over the second stitch. I continue doing this until only one stitch remains on my knitting needle.
Once I bind off all the stitches, it’s essential to weave in the ends. This step helps secure the yarn and prevents it from unraveling.
I grab a tapestry needle, thread the yarn through the needle’s eye, and then weave it through the wrong side of my work, following the pattern of the stitches.
I make sure to do this carefully to maintain the project’s overall appearance.
If my project includes buttonholes, I ensure they’re placed correctly to align with the buttons.
A few basic knitting techniques can create buttonholes, such as yarn overs, simple bind-offs, or eyelet buttonholes.
Depending on my project, I choose the most suitable buttonhole method.
Lastly, when binding off my stitch, I remember to leave a long tail, approximately 6 inches or more.
This tail will be useful for sewing seams or attaching embellishments later on, and it also helps to keep my work secure.
By following these steps, I can ensure that my knitting project is completed with a polished and professional look.
Keeping a friendly tone and offering helpful advice along the way is essential to guiding beginners through the process.
Comparison between Knitting and Crocheting
As a beginner in the world of yarn crafts, I often found myself confused between knitting and crocheting.
Although they may appear similar to the untrained eye, there are some key differences that make each technique unique.
One of the main differences between knitting and crocheting lies in the tools used. Knitting involves the use of two knitting needles while crocheting requires just a single crochet hook.
The shape of these tools also varies – needles are typically long and pointy, while hooks have a curved end.
In addition to the tools, the process of creating stitches differs significantly as well. In knitting, I generally keep multiple stitches on my needles at once, moving them from one needle to another to create the fabric.
In contrast, crocheting usually involves working with only one stitch at a time, using the hook to pull loops through previous stitches.
The resulting fabric also varies between the two techniques. Knitted fabric tends to be soft, stretchy, and drape more easily, making it perfect for comfortable garments like sweaters and scarves.
On the other hand, crochet fabric is often firmer and more textured, which makes it a popular choice for sturdy items like bags, toys, and home decorations.
Another notable difference I’ve observed is the terminology used in knitting and crocheting patterns.
Knitting patterns make use of abbreviations like K for knit and P for purl, while crochet patterns use abbreviations like SC for single crochet and DC for double crochet.
This can be a bit confusing at first, but it’s crucial to pay attention to the pattern language, as it’ll determine the method you’ll need to use.
Lastly, many crafters find one technique easier or more enjoyable than the other. Personally, I found crochet a little easier to pick up as a beginner because I only had to manage one hook and minimal stitches.
Nevertheless, others may prefer the smooth motion of knitting. Ultimately, it all comes down to personal preference and discovering what works best for you.
In conclusion, while knitting and crocheting share similarities, their unique tools, stitches, and resulting fabrics set them apart.
As a beginner, it’s worth trying out both techniques to see which one resonates with you and brings out the creativity in your yarn crafting journey.
Frequently Asked Questions
What are some easy knitting techniques for beginners?
As a beginner, I recommend starting with some basic knitting techniques like the knit stitch and the purl stitch. These two fundamental methods form the basis of most knitting projects.
Once you become comfortable with these techniques, you can then move on to learning basic knitting patterns like ribbing, seed stitch, and garter stitch.
How can I learn to cast on in knitting?
To learn how to cast on in knitting, you can follow these simple steps:
- Make a slipknot on your knitting needle.
- Hold the needle with the slipknot in your right hand and grasp the yarn with your left hand.
- Wrap the yarn around your left thumb and hold it with the rest of your fingers.
- Insert the needle under the yarn on your thumb, slipping it from your thumb to the needle and tightening the loop.
- Repeat this process to create more stitches.
There are multiple ways to cast on, but this is a basic and straightforward method for beginners.
Which knitting needles are best for beginners?
As a beginner, it’s essential to choose knitting needles that are comfortable to hold and easy to control.
I personally recommend using bamboo or wooden needles, as they have a smooth surface and do not slip as easily as metal needles.
Further, starting with a size US 8 or 9 (5mm to 5.5mm) needle can help make it easier to handle the yarn and to see your stitches.
Where can I find user-friendly knitting tutorials?
For beginner-friendly knitting tutorials, I suggest searching on platforms like YouTube and knitting blogs.
Many experienced knitters create detailed video tutorials or blog posts to teach various knitting techniques.
You can also check out knitting-focused websites like Ravelry or KnittingHelp for tutorials and pattern resources.
What are some simple knitting patterns for new knitters?
As a new knitter, there are a few easy patterns that you can start with, such as:
- Dishcloth: Practice your knit and purl stitches by knitting a simple dishcloth in a combination of these techniques.
- Scarf: Create a basic scarf using the garter stitch or simple ribbing for an easy and satisfying project.
- Baby blanket: Knit a small blanket using a basic stitch like the seed stitch or garter stitch for a quick and adorable gift.
- Headband: Practice knitting in the round by creating a simple headband using basic stitch patterns.
What are the two main methods of knitting?
There are two primary methods of knitting: English and Continental. In English knitting, I hold the working yarn in my right hand and throw it around the needle to create a stitch.
In Continental knitting, I hold the working yarn in my left hand and “pick” the yarn by scooping it up with the needle.
Both styles can create the same finished product, so choose the method that feels most comfortable for you.


